Bethesda Susa
| This article has information that is missing or not up to par.
Reason: Add list of all potential creature encounters, more tidying up, some more robust strata descriptions... |
Reason: Add list of all potential creature encounters, more tidying up, some more robust strata descriptions...
Bethesda Susa is a mid-game dungeon that the player is sent to with the quest Decoding the Signal once More Than a Willing Spirit is complete. For a guide on clearing Bethesda Susa, see Bethesda Susa/Guide.
| Spoiler Warning: This article contains information normally only found in the course of advancing the main quest line. |
Floors
| Strata | Name | Temperature |
|---|---|---|
| 0 | surface | 25° |
| 1 | ruined wharf | 16° |
| 2-4 | healing pools | 7°, -2°, -11° |
| 5 | abandoned ward | -20° |
| 6-10 | ruined ward | -29°, -38°, -47°, -56°, -65° |
| 11-12 | abandoned ward 2 | -74°, -83° |
| 13 | cybernetics ward | -92° |
| 14-15 | cryobarrios | -101°, -110° |
| 16 | Temple of the Rock | 25° |
Surface
Strata: 0
Temperature: 25°
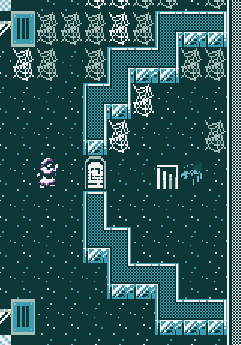
A fairly typical jungle exterior with marble ruins and a staircase leading downwards. Commonly populated by ![]() cragmensch boulderers,
cragmensch boulderers, ![]() brainers, and the occasional
brainers, and the occasional ![]() luminary.
luminary.
Ruined Wharf
Stratum: 1
Temperature: 16°
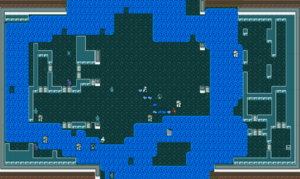
An underground river passes through here from the zones to the north and south.
Healing Pools
Strata: 2, 3, 4
Temperature: 7°, -2°, -11°
These three strata are quite similar, each containing a unique Troll. The first healing pool is guarded by ![]() Jotun, Who Parts Limbs, who carries the
Jotun, Who Parts Limbs, who carries the ![]() bronze key needed to unlock the down staircase. If you are neutral with the Trolls faction, you may simply trade for the key instead of defeating him.
bronze key needed to unlock the down staircase. If you are neutral with the Trolls faction, you may simply trade for the key instead of defeating him.
The second healing pool is guarded by ![]() Fjorn-Kosef, Who Knits The Icy Lattice, who holds the
Fjorn-Kosef, Who Knits The Icy Lattice, who holds the ![]() silver key needed to proceed. Again, they may be traded with if the player's faction reputation is sufficient.
silver key needed to proceed. Again, they may be traded with if the player's faction reputation is sufficient.
The final healing pool is defended by the invisible ![]() Haggabah, Who Plies The Umbral Path, the third and most dangerous of the trolls. Haggabah possesses the
Haggabah, Who Plies The Umbral Path, the third and most dangerous of the trolls. Haggabah possesses the ![]() gold key required to advance. Unlike the previous Trolls, trading with Haggabah is a bit more challenging due to his Invisibility.
gold key required to advance. Unlike the previous Trolls, trading with Haggabah is a bit more challenging due to his Invisibility.
Abandoned Ward
Stratum: 5
Temperature: -20°
On the 5th stratum down is a ![]() chrome platform which can be used to skip the next 5 strata, taking the player all the way down to the 11th stratum. Stand on it and activate the
chrome platform which can be used to skip the next 5 strata, taking the player all the way down to the 11th stratum. Stand on it and activate the ![]() control switch to go down. This same elevator can be recalled to anywhere in its path by using the button stationed there, and can be used to re-ascend to this stratum.
control switch to go down. This same elevator can be recalled to anywhere in its path by using the button stationed there, and can be used to re-ascend to this stratum.
Ruined Ward
Strata: 6, 7, 8, 9, 10
Temperature: -29°, -38°, -47°, -56°, -65°
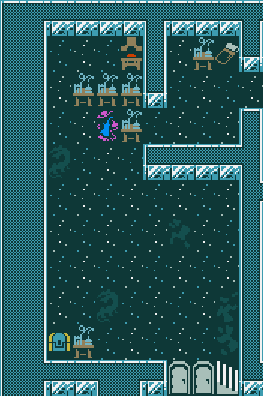
Eight strata below Bethesda Susa you will find the ![]() alchemist in their workshop. Speaking with them grants an achievement. Be wary of provocation, once hostile the alchemist can, and will, go out in a blaze of glory (Meaning that they will attack with a neutronic explosion, which will likely kill the player character).
alchemist in their workshop. Speaking with them grants an achievement. Be wary of provocation, once hostile the alchemist can, and will, go out in a blaze of glory (Meaning that they will attack with a neutronic explosion, which will likely kill the player character).
Abandoned Ward 2
Strata: 11, 12
Temperature: -74°, -83°
The 11th stratum holds the destination platform for the elevator from the 5th level. If the elevator platform is not present, it may be called to this strata using the control switch. If wanting to descend, the player can jump into the ![]() deep shaft to arrive at the 12th stratum, or can just take the stairs.
deep shaft to arrive at the 12th stratum, or can just take the stairs.
Cybernetics Ward
Stratum: 13
Temperature: -92°
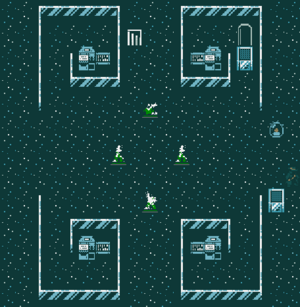
On this stratum are four ![]() becoming nooks.
becoming nooks.
Cryobarrios
Strata: 14, 15
Temperature: -101°, -110°
If the player has no cold resist at all, they can freeze solid on these strata.
There are six cryogenic chambers on the 14th stratum, and the intact ones are filled with ![]() cryogenic mist. A
cryogenic mist. A ![]() phase spider has been spinning
phase spider has been spinning ![]() phase webs at the east end of the floor, which are one possible way of passing through the
phase webs at the east end of the floor, which are one possible way of passing through the ![]() fused security door sealing the stairs downward.
fused security door sealing the stairs downward.
Stratum 15 contains six more intact cryogenic chambers, several of which contain (in a frozen state) potentially game-ending creatures. Also, there is a (non-frozen) ![]() juicing cannibal carrying a fully operational
juicing cannibal carrying a fully operational ![]() missile launcher. If the cannibal explodes open any of the chambers, the player may be forced to confront:
missile launcher. If the cannibal explodes open any of the chambers, the player may be forced to confront:
 Saad Amus, the Sky-Bear, who carries the
  Flume-Flier of the Sky-Bear and a
  ceremonial vibrokhopesh
- a
 yempuris phi
 - a
 rhinox
 - or another phase spider
To the west is another ![]() chrome platform and control switch to go down a single stratum to the final level.
chrome platform and control switch to go down a single stratum to the final level.
Temple of the Rock
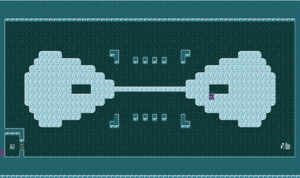
Stratum: 16 Temperature: 25°
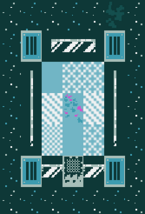
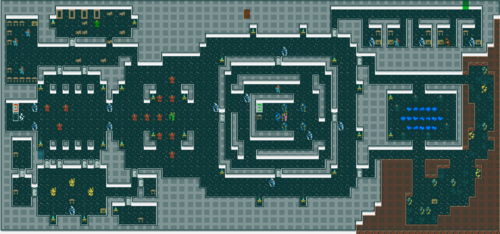
If the player has sufficient reputation to enter the holy places of the Mechanimist faction, this is a peaceful level, and the player can even loot the chests found here without provoking hostility. If not, they may be forced to confront a variety of dangerous Mechanimists, including ![]() Phinae Hoshaiah, High Priest of the Rock.
Phinae Hoshaiah, High Priest of the Rock.
The player can make their way to the ![]() baetyl located slightly east of center of the zone to advance the Decoding the Signal quest. The control switch behind the baetyl will reactivate the entrance elevator leading back to the previous floor.
baetyl located slightly east of center of the zone to advance the Decoding the Signal quest. The control switch behind the baetyl will reactivate the entrance elevator leading back to the previous floor.
A lone ![]() disciple of the Sightless Way will always spawn somewhere on this floor, though the Mechanimists are not friendly to them.
disciple of the Sightless Way will always spawn somewhere on this floor, though the Mechanimists are not friendly to them.
Tips
Players should be prepared to deal with increasingly low temperatures as they descend, as well as to fight or bypass the inhabitants and hazards of Bethesda Susa. Some things that may help:
- High reputation with the Mechanimists.
- Cold resistance equipment, such as an
 elastyne skull cap or
  ape fur hat, an
  ape fur cloak or
  quilted shawl,
  ape fur gloves, and any equipment modded to be wooly.
 - Protection from gases, such as a
 vinewood sap mask,
  gas mask or other equipment that is fitted with filters.
 - A weapon that is electrified to deal with the many Robots in Bethesda Susa.
- A source of normality or normality gas, such as a
 normality gas grenades, a
  normality gas pump, or weapons modded with nulling to deal with the infrequent, but dangerous
  twinning lamprey that roam the abandoned wards past the healing pools.
- Normality gas may also be generated by killing the massive quantities of Plastronoids that populated Bethesda Susa. Killing multiple Plastronoids in a small area may build up sufficient normality gas that a twinning lamprey can then be lured into. This is best used as a backup plan, as both setting up this trap and the gas generated will be inconsistent.
- Some way to cool down enemies, such as a
 freeze ray, a freezing weapon, or
  freeze grenades, as the low temperatures make everyone else more vulnerable to being frozen too.
 - Explosives or vibro weapons to deal with the Cragmensch that can be found throughout Bethesda Susa.
- Many
 bandages to deal with the bleeding inflicted by
  lurking beths. Defoliant can be used to clear clusters of beths without angering other creatures.
 - Tonics that help with the cold, such as
 rubbergum injectors or
  luminous hoarshrooms, which can also be harvested in Bethesda Susa.
 - The
 flamethrower is extremely useful if you have enough
  oil to use it, as its naturally high piercing will help against Cragmensch, its wide area of effect will help with large groups of enemies and twinning lamprey, and the trolls are not able to resist its heating effect. Additionally, it will keep you warm.
Trivia
- Bethesda Susa can be playtested by wishing for 'stage4'.
- Before game version 202.78, the four strata below the Temple of the Rock were named: Amplitheatre[sic] of the Mind (stratum 17), Morphorium (strata 18-19), and Genesis Chamber (stratum 20). However, these deeper levels were procedurally generated, using the generic 'ruins' tiles and layout, and were populated principally by lower-level creatures found elsewhere in Bethesda Susa. They were not connected to the levels above with stairs, and as such, were inaccessible without a
 spiral borer or similar means of digging downwards. These strata were then replaced with generic subterranean caves, before being revamped in the 7th Plague update (game version 2.0.206.26). Since then, the subterranean cave generation has been augmented with unique features, a twinning creature template, and regular pits down, leading to the cradle of
  Girsh Bethsaida (stratum 30).
